Deep Learning for Image Classification
Our brains make vision seem easy. It doesn’t take any effort for humans to tell apart a lion and a jaguar, read a sign, or recognize a human’s face. But these are actually hard problems to solve with a computer: they only seem easy because our brains are incredibly good at understanding images.
In the last few years the field of machine learning has made tremendous progress on addressing these difficult problems. In particular, we’ve found that a kind of model called a deep convolutional neural network can achieve reasonable performance on hard visual recognition tasks – matching or exceeding human performance in some domains.
Researchers have demonstrated steady progress in computer vision by validating their work against ImageNet – an academic benchmark for computer vision.
Transfer Learning
Modern object recognition models have millions of parameters and can take weeks to fully train. Transfer learning is a technique that shortcuts a lot of this work by taking a fully-trained model for a set of categories like ImageNet, and retrains from the existing weights for new classes.
Though it’s not as good as a full training run, this is surprisingly effective for many applications, and can be run in as little as thirty minutes on a laptop, without requiring a GPU. This tutorial will show you how to run the example script on your own images.
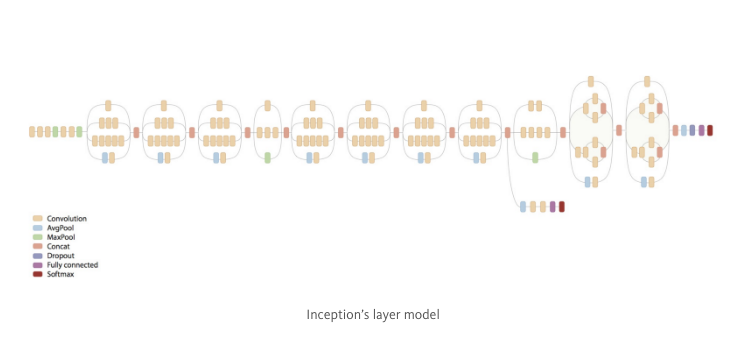
In this example we’ll be retraining the final layer from the pre-trained Inception v3 model from Google, while leaving all the others untouched. We remove the old top layer and train a new one on celebrities faces we wanted to add.
Inception-v3 is trained for the ImageNet Large Visual Recognition Challenge using the data from 2012. This is a standard task in computer vision, where models try to classify entire images into 1000 classes, like “Zebra”, “Dalmatian”, and “Dishwasher”.
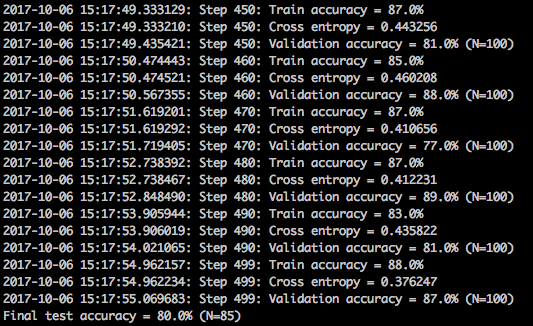
The re-training works in two phases — Bottleneck and Training:
-
The first phase analyzes all the images on disk and calculates the bottleneck values for each of them. Bottleneck is an informal term used for the layer just before the final output layer that actually does the classification. It processes the images to a meaningful and compact summary of the images to contain enough information for the classifier to make a good choice in a very small set of values.
-
The second phase is the actual training of the top layer of the network. You could see a series of step outputs, each one showing training accuracy, validation accuracy, and the cross entropy. The training accuracy shows what percent of the images used in the training were labeled with the correct class. The validation accuracy is the precision on a randomly-selected group of images from a different set. Cross entropy is a loss function which gives a glimpse into how well the learning process is progressing.
The TensorFlow team already prepared a tutorial on how to execute the image classification on your machine. Nevertheless, I’ll show you as well.
Image classification on the pre-trained ImageNet data set
Well, as we aren’t starting from scratch, start by cloning the Tensorflow models repository from GitHub. Run the following commands:
git clone https://github.com/tensorflow/models.git
cd models/tutorials/image/imagenet
python classify_image.py
The above commands will classify a supplied image of a panda bear.
If the model runs correctly, the script will produce the following output:
giant panda, panda, panda bear, coon bear, Ailuropoda melanoleuca (score = 0.88493)
indri, indris, Indri indri, Indri brevicaudatus (score = 0.00878)
lesser panda, red panda, panda, bear cat, cat bear, Ailurus fulgens (score = 0.00317)
custard apple (score = 0.00149)
earthstar (score = 0.00127)
Let’s try a cute dog photo and see the model performance.
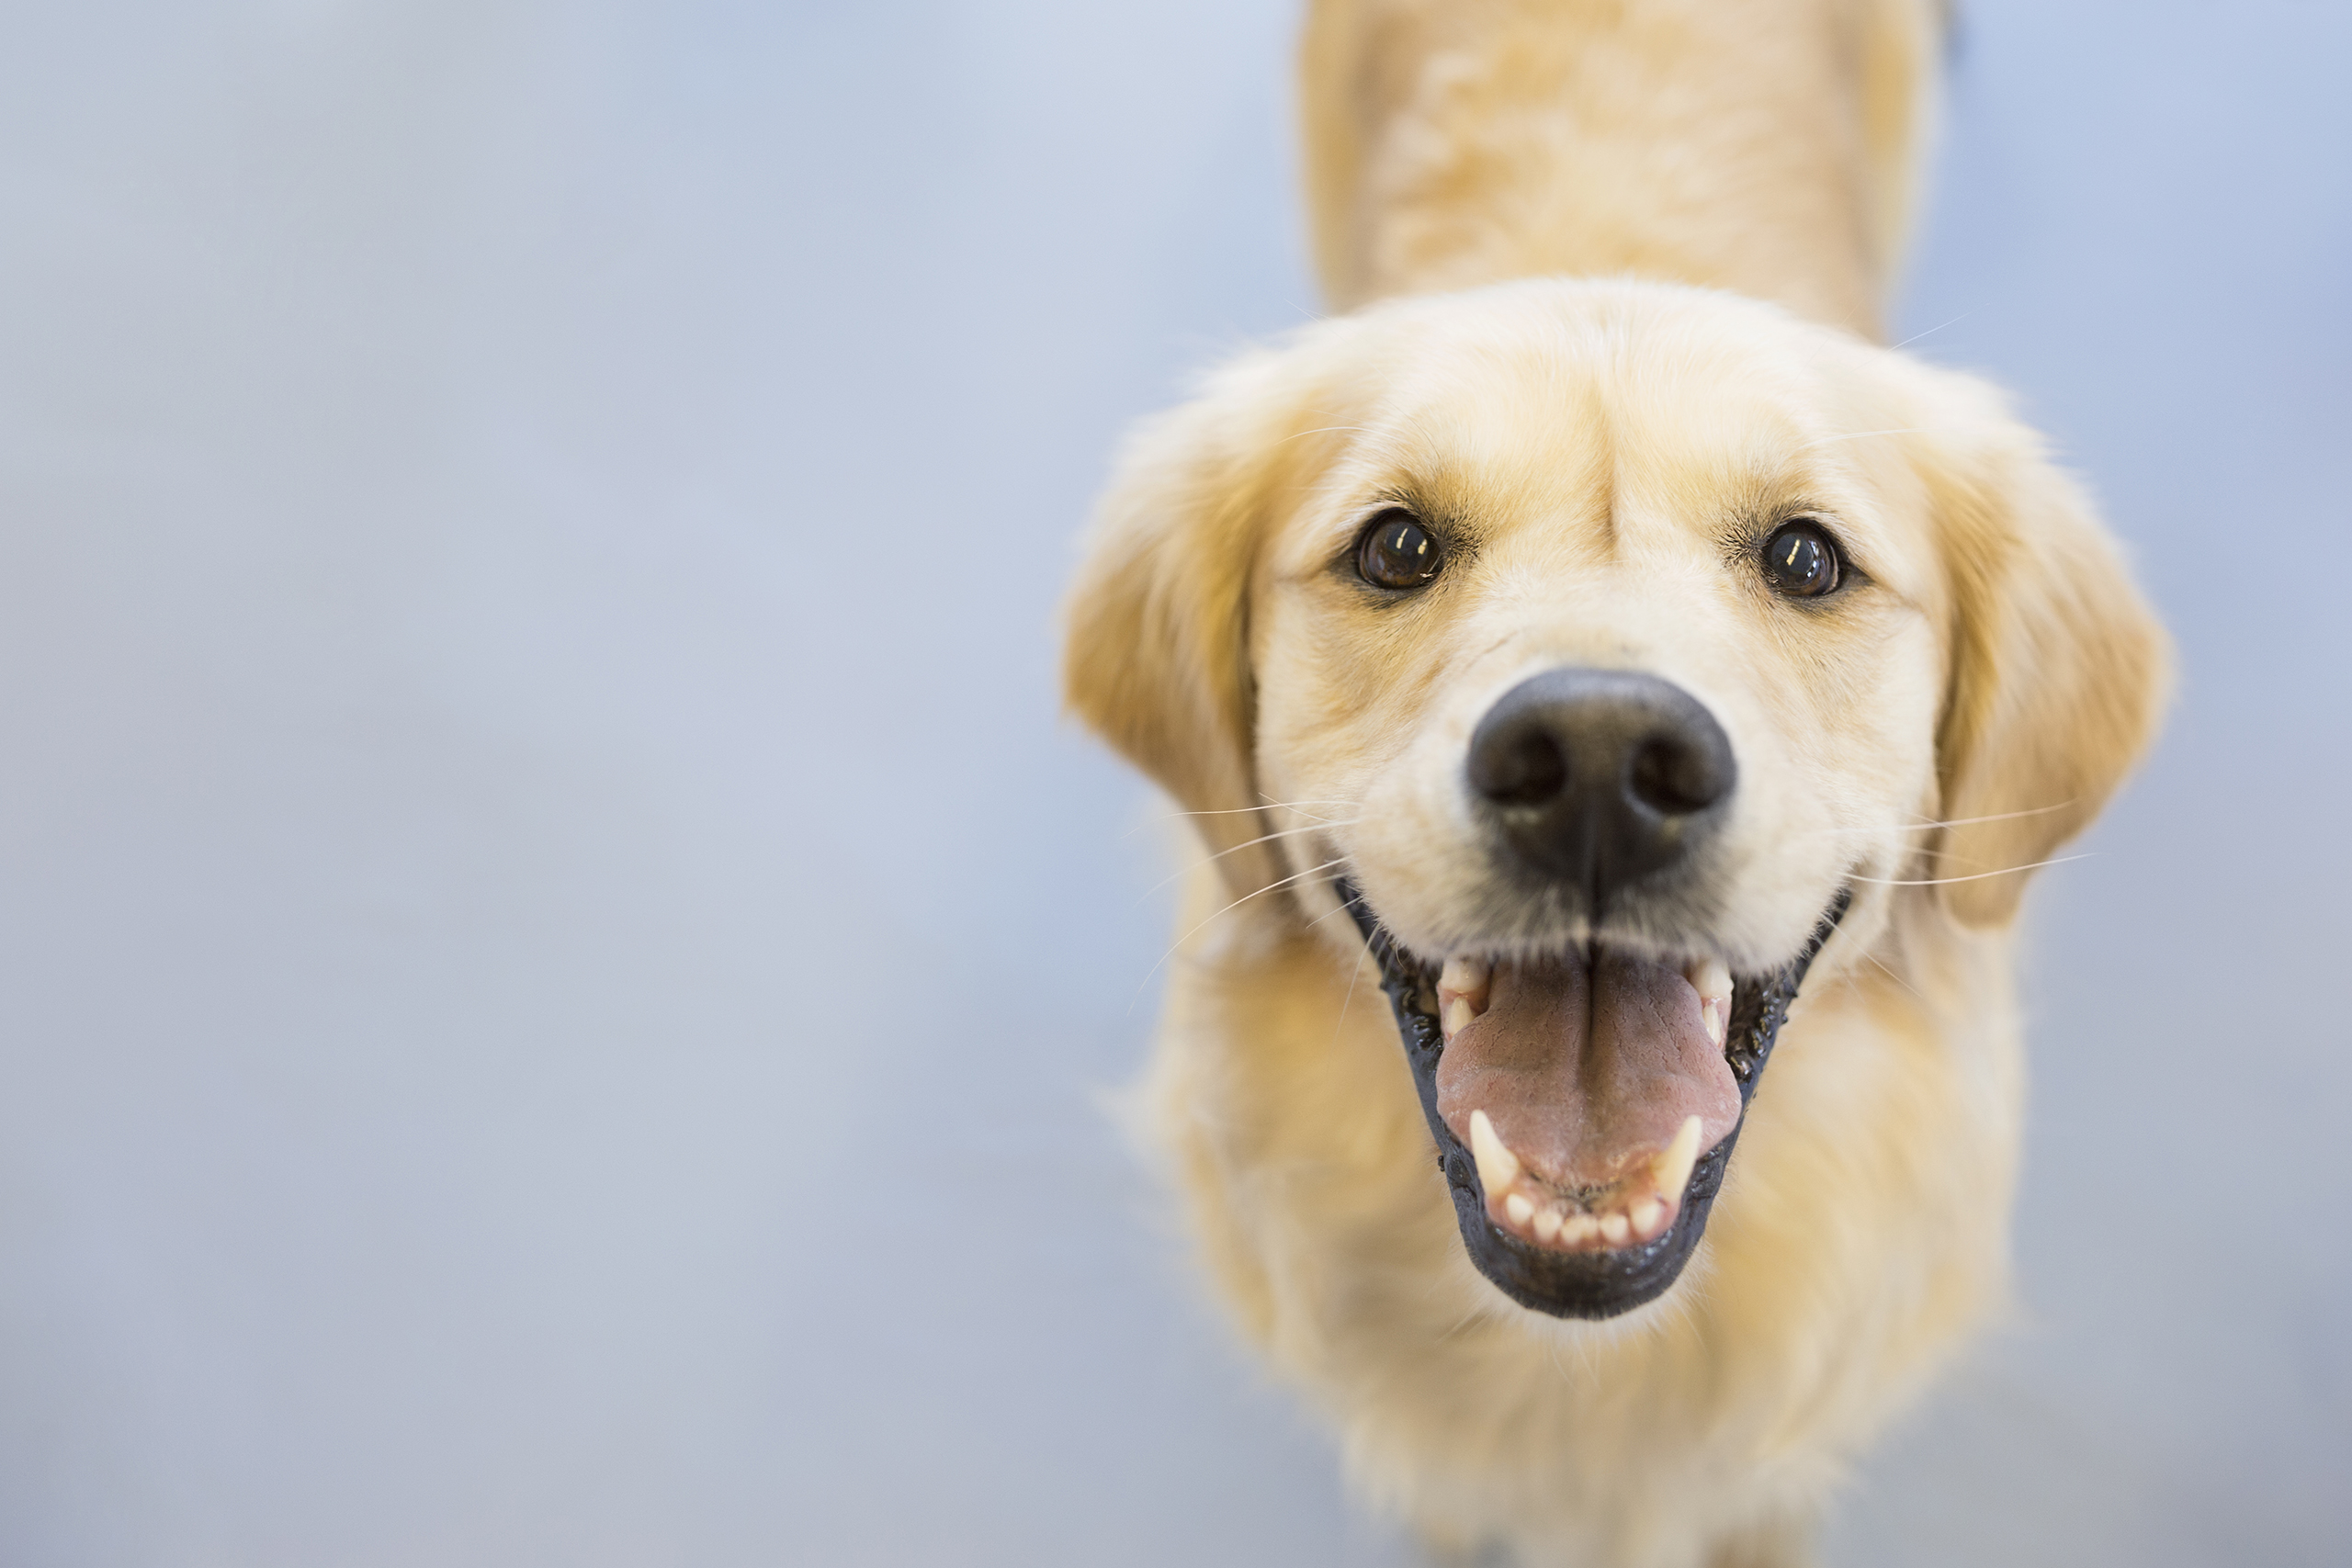
python classify_image.py --model_dir '~/Downloads' --image-file 'dog-jpg'I was thinking about a simple dog label and the result impressed me!
golden retriever (score = 0.84326)
Labrador retriever (score = 0.10810)
kuvasz (score = 0.00152)
doormat, welcome mat (score = 0.00113)
tennis ball (score = 0.00112)
Retrain Inception’s Final Layer for specific categories
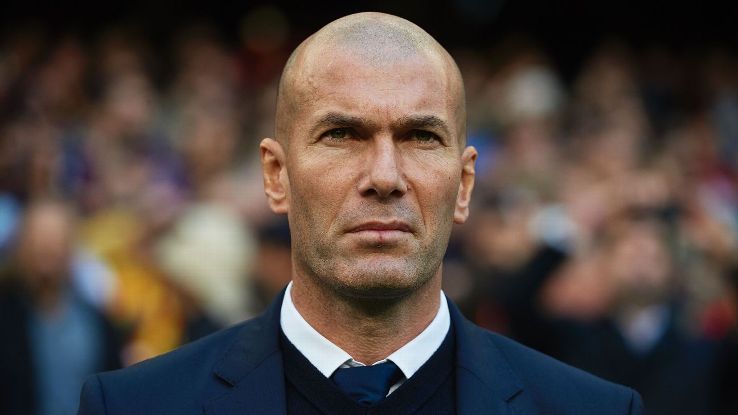
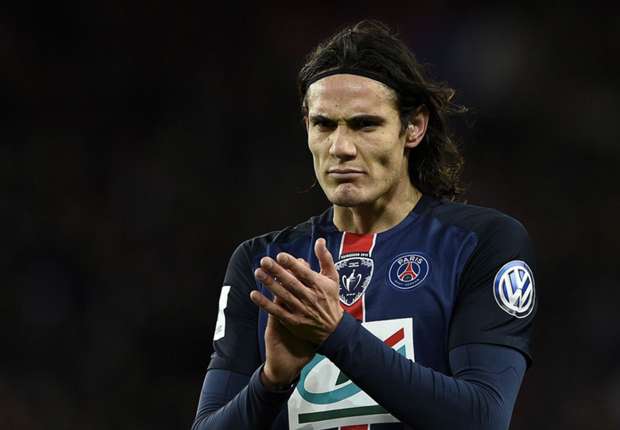
Let’s classify three different people: Neymar, Cavani and Zidane. Let’s see if Inception is strong enough to differentiate between those people’s faces:
Next up, we need to add our training images and label them. Create a training_dataset folder and subfolders named by a class with the pictures files building a structure like this:
/training_dataset
	/neymar
		neymar1.jpg
		neymar2.png
		...
	/cavani
		cavani1.jpg
        	cavani2.jpg
		...
	/zidane
		zidane1.jpg
		zidane2.jpg
		...
To download the images, I use an image crawler implemented in shell script. Clone the project and get around 300 photos of your celebrity just editing the query_list.txt with the keywords you want.
git clone https://github.com/jonnyhsy/imagecrawler.git
cd imagecrawler
chmod +x image_crawler.sh
./image_crawler.sh google 300
Execute
After setting up all directories and data sets, let the training begin! Start by cloning my repository from GitHub and execute the train.sh script:
git clone https://github.com/MatheusRabetti/tf-image-class.git
chmod +x train.sh
./train.sh
The script installs the Inception model (if not already installed) and initiates the re-training process for the specified image data sets.
Once the process is completed, the training accuracy should be somewhere around 90 percent.
After re-training the model, it’s now time to test the model with other images.
How does our model perform?
Download and copy one picture of each into the root directory. To validate the model type:
python classify.py neymar.jpg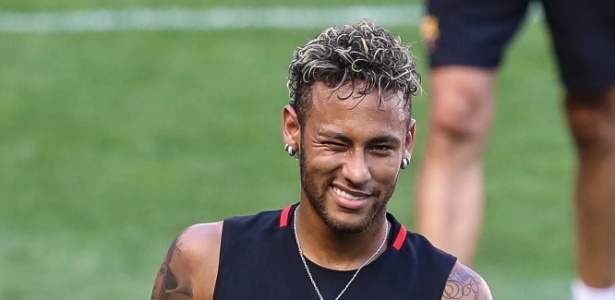 |
 |
 |
|---|---|---|
| Neymar | Zidane | Cavani |
| neymar: 0.74 | neymar: 0.00 | neymar: 0.47 |
| zidane: 0.12 | zidane: 0.99 | zidane: 0.25 |
| cavani: 0.13 | cavani: 0.00 | cavani: 0.28 |
Surprisingly, Zidane and Neymar gets recognized. Zidane gets classified by a huge margin. Well done, Inception!
Otherwise, in Cavani’s picture, the model got confused between him and Neymar. Why?
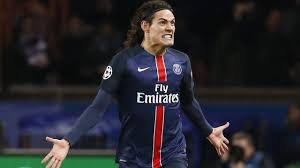
Multiple elements to discover a person
 |
 |
|---|---|
| Napoli | Paris Saint Germain |
| neymar: 0.28 | neymar: 0.46 |
| zidane: 0.06 | zidane: 0.03 |
| cavani: 0.66 | cavani: 0.50 |
The shirt’s team color is, probably, influencing the estimation and here we find out the first limitation on using this model to classify people. It uses the entire picture to classify a person and the training images have a lot of pictures of the players with the same shirt. This results on the shirt participating on classifing the player.
Two players
That’s a tricky one! Inception is trained for single-label image classification, which means that it adds up to a total score of one. Multi-label classification is not possible, and since two of our classes are shown in the image, both can’t get a high score. That’s another limitation!
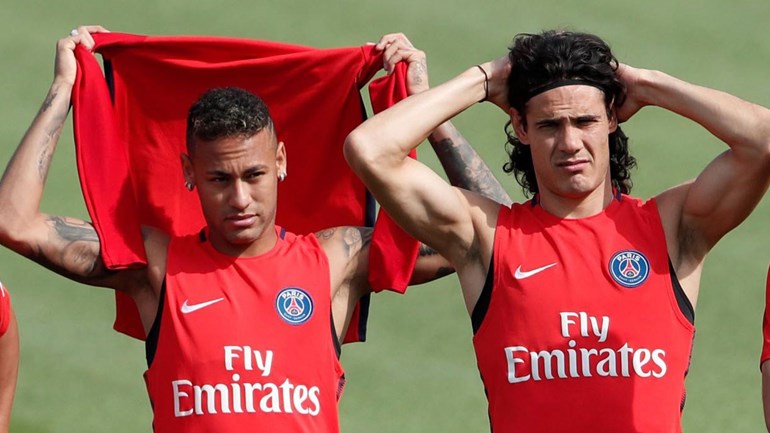 |
neymar: 0.27 zidane: 0.02 cavani: 0.71 |
Train on all players
A hard task is to train the model for all possible players. If we run the model on a Gabriel Jesus picture, the model calculates the probability of he being one of the trained player.
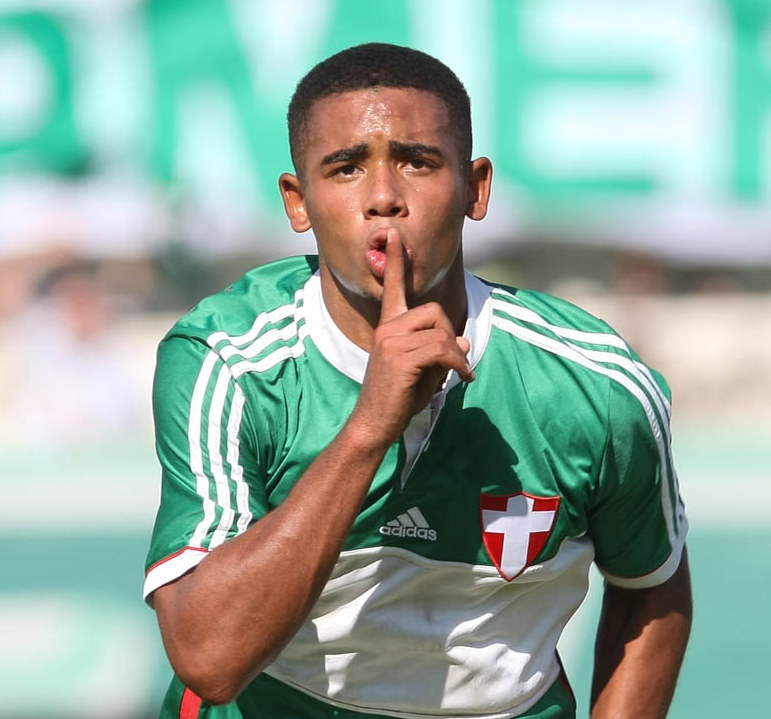 |
neymar: 0.82 zidane: 0.02 cavani: 0.16 |
Next steps
- Face detection: locate the faces in a photograph before we can try to tell them apart!
- Multiple object output: identify different faces and return a probability for each.
- Test on videos: return probabilities frame by frame of a video.